Showing posts with label Step by step tutorials. Show all posts

Sunday, 26 July 2015

Envelope card

Good afternoon friends, followers and casual visitors,  today I am sharing with you a card I made at my local craft class.  I have called it an envelope card, I am not sure if this is the correct name for it but it does remind me of an envelope.  So instead of just showing you the card I decided to do a quick step by step tutorial on how to make one.
 So you will need 2 x A4 sheets of card,  patterned paper, rubber stamps, ink pad and double sided tape, as well as a paper trimmer,  Hougie board or ruler and bone folder and a corner rounder.


1. Cut one A4 piece of card to 14.5 cm wide and the other piece 14.7 cm wide


 2. On the 14. 5 cm piece, write the word 'bottom' somewhere in the middle


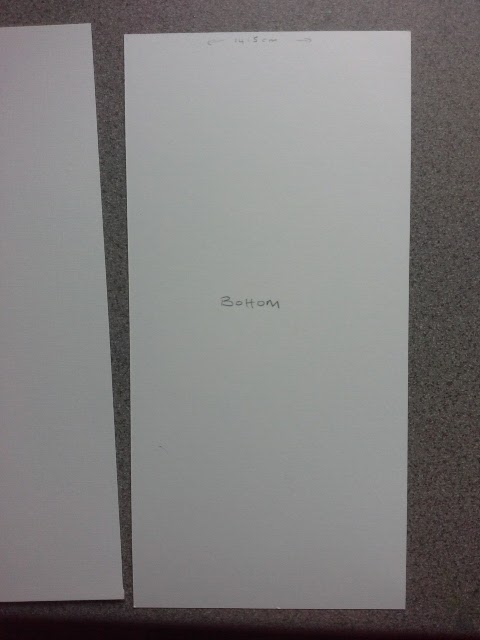
3. Score each piece at 7.5 cm,  turn and score at 7.5cm


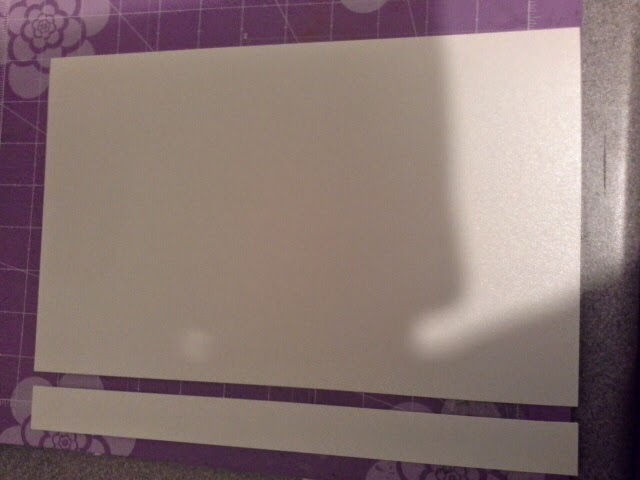
4. Lay the 14.7 cm piece on top of the 14. 5 cm piece, as shown and check that the flaps meet on both pieces without overlapping, trim off a tiny slither if they do.  You may also need to trim a tiny piece off the 14.7 cm piece too to ensure it fits neatly.


5. Round the corners on both pieces and set aside


6. Cut the patterned paper to 14cm square


7. Stamp your chosen design around the edges. I used the 2 swirly flourishes from the free stamp set from Creative Stamping and a Happy Birthday stamp from another set but use whatever you have or leave blank


8. Attach the 14.7 cm on top of the 14.5cm piece of card as shown with double sided tape and attach patterned paper to centre


 9. Cut 4 pieces of patterned paper 6.5 cm square and stamp each piece.


10. Fold in the flaps of the base card as shown, tucking under the last flap. This will help you determine where to place your patterned pieces.


11. Once you are happy with your layout, corner round each piece adjacent to the rounded corner on the base card


 12 Your card is now complete

I hope you like this little tutorial and that you have a go at making this unusual design.  I think it makes a great masculine card and you could write a message on the inside too.
Thank you for visiting today and if you have any questions on this or any other projects,  please feel free to ask.
Hugs Lainie xx


Tuesday, 12 May 2015

Quick and simple pen/scissor/ruler etc holder

Good morning, friends, followers and fellow bloggers. Well it's not as warm here today as it was yesterday and ghere's no sun 😔.
The project I would like to share with you is one that I saw on Pinterest,  which inspired me to have a go myself.

It's a very quick and simple storage solution for my scissors and rulers, as they just either got in the way or fell out of my other containerts which I have on my craft workspace. I hate rummaging in drawers for things and like to have everything close to hand. 
So, this is so simple and so perfect, plus it has been stuck to the side of my shelf unit, so is out of the way too. Happy days! 😀

So here's what you do

First remove any labels and cut your plastic container (either shampoo or bubble bath, lotion etc) to the height required. I cut about a third off the top of mine.

Second, smooth the rough edges by placing the top of your bottle against the bottom of a hot iron, this makes them nice and flat and smooth. Please be careful not to melt it though.

Third, decorate any way you choose.  I found these adhesive butterflies worked well for me.

Finally, attach large sticky foam pads to the pack and your pot is ready to go.

If you don't want to stick your pot to a wall or cupboard etc. then you will probably have to weight the bottom to stop it tipping over.

I hope you like this simple and very inexpensive or should I say free? project.

Thank you for visiting and if you do leave a commen,  many thanks for that too.
Hugs Lainie xx

Friday, 8 May 2015

Step by Step Flip-It card

Good afternoon friends, followers and fellow bloggers, I do hope you have had a good week. It has flown by for me without actually achieving anything really. So I thought best that I do what I intended to do and that is post a step by step tutorial on my Flip-it card. So here it is:

1. First take a sheet of card and fold in half


2. Choose the die and place it on the front of your folded card close to the centre


3. Score  above the die from the top of the card but only as far as the die


4. Do the same at the bottom. DO NOT SCORE THROUGH THE CENTRE OF THE DIE


5. Attach the die to the card front with low tack tape, as you don't want it to shift when you run it through your die cutting machine


6. Place it Face Down on your cutting plate and line up the score line with the edge of the cutting plate


6. Lay the base plate on top in the same position, so that some of the card is poking out


8. Run it through your die cutting machine


9. Remove the die


10. Fold the front back on itself at the score line and bone fold


11. Your card is now ready to decorate


For my card I covered the inside and front panel with patterned paper and then die cut smaller shapes and attached to the front and back of the flip-it and one inside for the sentiment


I added ribbon and a bow to the folded edge


And finally added some spiral roses, flowers and flourish, plus a sentiment on the flip-it.


I really hope you find this little tutorial useful. If you have any questions please just ask, I will do my best to answer them.
Hugs and thank you for visiting. If you choose to follow, then please be sure to let me know so I can visit your blog too.
Lainie xx

Saturday, 14 March 2015

Shaving foam backgrounds

Hello friends, followers and callers by. I have at last managed to get my act together and do a shaving foam tutorial.  It really is so easy and it is great fun, even if a little messy, so wear rubber gloves if you wish but because it's shaving foam it doesn't stain.
So are you ready?
Then here goes.

Step 1
Start by adding some shaving foam to a non stick craft mat or any wipe cleanable surface.

Step 2
Add a few drops of ink in as many colours as you wish - I used Tim Holt Distress ink in Festive Berries and Mowed Lawn but you can use any re-inkers in any colours.

Step 3
Lightly blend the inks with either a wooden skewer, a ruler, cocktail stick, knitting needle or the handle of a paintbrush etc.

Step 4. To create a background


Place a sheet of card or paper (any size) directly on top of the inky  shaving foam.

Step 5

Lift off, dragging slightly towards you as you do and then either leave to dry for a slightly textured result or as I have done here, scrape off the ink with a ruler.

 This can now be cut to size, stamped on, die cut or used in any way you wish.

 Step 6 For a Stencilled Background

Tape your chosen stencil to a piece of card stock

Step 7

Spread inky shaving foam all over the stencil

Step 8
Scrape off the foam with a ruler. Remove the stencil and either leave to dry or as I have done, wipe the excess foam off with a piece of kitchen towel


I must admit, I wish I had left it to dry naturally as the effect was much better but it is always trial and error and sometimes it turns out awesome and other times, awful.

I do hope you give this one a go as you can create some wonderful effects even with just one ink, just don't blend too much.

Have a lovely weekend and Happy Mothers Day to all you mums.

Thank you for dropping by and for any comments you may wish to leave.

Lainie xx

Monday, 23 February 2015

Handbag Gift Bag


Good evening friends, followers and casual callers I hope you have all had a good day. Bloomin' 'eck it's cold outside.
Well here it is, another step by step by popular demand ( yes I made that bit upl) this time it's for my handbag gift bag.  I taught my  year old grandaughter to make them at the weekend and shared them with you on my previous post.

All you need is 2 A4 sheets of card, A4 sheet of patterned paper, 2 magnets and embellishments of your choice.


Step 1. Trim 2.5 cm off the long edge of one of the A4 sheets and put to  side.


Step 2. Trim the rest of the sheet to 7 inches wide


Step 3. Score this piece at 9cm,  12cm, 12cm and 21cm


Step 4. Trim the patterned paper to 17cm wide


               Then cut 2 pieces  8.5 cm
                                 2 pieces 2.5 cm
                                 1 piece 4cm ( this is for the front flap)

Step 5.  Stick the patterned pieces to the card thus: the 2 x 8.5 pieces to the larger      
               sections, the 2.5 pieces to the 2 narrow sections and the 4cm piece to the
               front section.


Step 6. Now cut 2 pieces 10 cm x 8.5 cm from the second A4 sheet of card and score at
              every 1cm along the longer edge


Step 7. Concertina fold along these score lines ( these form the side gussets)


Step 8. Stick these side pieces between the 2 larger section of the bag. I used extra strong DST for this.


Step 9. Score the strap from step one at 2 cm at both ends, this forms the handle.


Step 10. Attach the handle to the underside of the top section as shown


Step 11. Glue the magnets in place. I used Glossy Accents.


   Your bag is now ready to be embellished.  You could stick patterned paper on to the handle too if you wish.

I do hope you find my step by step instructions eady to follow and will have a go yourself.

Thank you for visiting. Please come again.

Lainie xx