Saturday 28 February 2015

Wedding Favours


Good morning friends and visitors, it's a lovely sunny day here in Kent, let's hope it lasts. 
Today I am sharing with you the Wedding Favour Boxes that I have made. These are a few examples to show one of the ladies at my Slimming World group who has asked for them.
I got the idea for the shape from some Specialist Green Tea which was a gift from a friend. The tea bags come in pyramid shaped boxes which I thought would make unique favour boxes (I could be wrong of course lol).  I drew roubd tge boxex to make a template and then cut ghem out, folded and decorated them, no gluing necessary. Well I hope she likes them.
I hope you all have a lovely day whatever you have planned. 

Lainie xx

Friday 27 February 2015

Ballet Slippers


Good evening blog buddies and visitors, I just wanted to share with you the Clippie that I made. It is my first attempt after watching a fab tutorial on YouTube by laceybowsboutique.  The lady doing the tutorial added white tulle to the back of her ballet slippers but I only have some in black and didn't think it would look as good as white.  However I am quite happy with how it turned out, although I must learn to control my glue gun better lol.

Well thank you for visiting and if you leave a comment thank you for that too.  Any criticism or pointers would be appreciated as well.
Lainie xx

Thursday 26 February 2015

Magic in Monochrome


Good afternoon friends, followers and visitors. It's another cold, wet day here today, I hope the weather is better where you are.
Today's card is for another challenge over on Docrafts. This one is through Enchanted Challenge and the theme was 'monochrome'. I have used this image before, not so long ago but thought her perfect for this challenge also.
Materials used were:
A3 card folded and cut to 16cm x 18 cm
Image coloured with Black, Ice Grey 5,3 and 1 Promarkers
Stickles
Glossy Accents on the Bubble and her lips
Black card
Black flower from The Range
Gem from stash

My daughter in law loved it and asked me for one with red highlights in her hair and  red flower. Here are 2 options:

She chose the second one.

You probably guessed, I just swapped the flower on the original card and added red to her hair.
Thank you so much for dropping by to look at my blog and your comments mean so much to me.
Lainie xx

Tuesday 24 February 2015

Bunny holiday


Good morning friends, followers and passers by, it's a really wet day here today, so not sure that my 6 dogs will get a walk this morning. There is nothing worse than the house smelling of damp dog urrrrgh!  
Today's card is one that I made for the Noah's Ark Challenge over on Docrafts. The challenge was to make a card suitable for a small boy aged 3 - 7. I was very lucky to win this delightful topper ( and numerous others) in a draw also over on Docrafts which I thought perfect for the challenge.  I just added some Glossy Accents to the rubber ring, mounted the image on to a circle of card coloured with Promarker ( I didn't have any card of the right colour) and layered on to some patterned paper from my stash. I then stamped the sentiment and added a button. Job done!

Thank you for visiting my blog today and also for any comments you may wish to leave.

Lainie xx

Monday 23 February 2015

Handbag Gift Bag


Good evening friends, followers and casual callers I hope you have all had a good day. Bloomin' 'eck it's cold outside.
Well here it is, another step by step by popular demand ( yes I made that bit upl) this time it's for my handbag gift bag.  I taught my  year old grandaughter to make them at the weekend and shared them with you on my previous post.

All you need is 2 A4 sheets of card, A4 sheet of patterned paper, 2 magnets and embellishments of your choice.


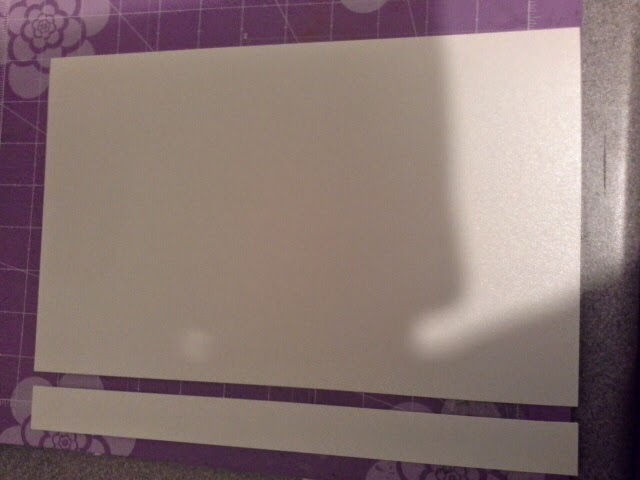
Step 1. Trim 2.5 cm off the long edge of one of the A4 sheets and put to  side.


Step 2. Trim the rest of the sheet to 7 inches wide


Step 3. Score this piece at 9cm,  12cm, 12cm and 21cm


Step 4. Trim the patterned paper to 17cm wide


               Then cut 2 pieces  8.5 cm
                                 2 pieces 2.5 cm
                                 1 piece 4cm ( this is for the front flap)

Step 5.  Stick the patterned pieces to the card thus: the 2 x 8.5 pieces to the larger      
               sections, the 2.5 pieces to the 2 narrow sections and the 4cm piece to the
               front section.


Step 6. Now cut 2 pieces 10 cm x 8.5 cm from the second A4 sheet of card and score at
              every 1cm along the longer edge


Step 7. Concertina fold along these score lines ( these form the side gussets)


Step 8. Stick these side pieces between the 2 larger section of the bag. I used extra strong DST for this.


Step 9. Score the strap from step one at 2 cm at both ends, this forms the handle.


Step 10. Attach the handle to the underside of the top section as shown


Step 11. Glue the magnets in place. I used Glossy Accents.


   Your bag is now ready to be embellished.  You could stick patterned paper on to the handle too if you wish.

I do hope you find my step by step instructions eady to follow and will have a go yourself.

Thank you for visiting. Please come again.

Lainie xx

Sunday 22 February 2015

Nurse Cratchett


Good afternoon, friends, followers and visitors from a very wet Kent.  My card today features a scary nurse who I call Nurse Cratchett,  I found this image on Google which I have used before and decided to include her on another card for the I 💜 Promarkers challenge, 'Make us laugh'.  I coloured her with Promarkers of course and mounted her onto patterned paper from my stash.  The sentiment was computer generated but originally came from Google.   I hope you are amused by my card. Thank you for visiting and any comments you leave are always appreciated.  Lainie xx


Saturday 21 February 2015

Ribbon and Lace


Good evening friends,  followers and visitors I hope you are having a great weekend.  Today I did somd crafting with my grandaughter before taking her for her horse riding lesson and then we've spent the entire afternoon and evening watching Harry Potter DVDS.   The weather has been so awful that this was an ideal way to spend the day.
This is the card I made which I would like to enter in to the Fab n Funky , Ribhon and Lace Challenge,  my grandaughter made 2 gift bags which turned out beautifully.
For my card I used:
A4 card folded in half
Patterned paper from stash
Saturated Canary 'Nevaeh' digi stamp which I coloured with Promarkers
Lace from my local Around A Pound shop
Ribbon from The Works

These are the gift bags that my grandaughter made using A4 card and patterned papers. She embellished them with gems and a button. Both bags have magnetic fastenings and contain a bar of chocolate.  She will give them to her mum and step mum for Mothers day.

Thank you for visiting my little blog and any comments you leave are always appreciated.
Lainie xx

Thursday 19 February 2015

Heart Topper


Hello again. As it's cold and miserable here this afternoon, what better way to spend it than shut away in my craft room,  doing the thing I love most?
I made this simple little topper for the monthly challenge over on Docrafts, which I thought would be ideal for wedding cards or invitations or anniversary cards. Materials I used were:
Pearlised card
X Cut Scalloped Heart dies
Wedding Ring dies
White Ribbon bow
and that's it.  So it is ready to go on my next wedding or anniversary themed creation.
I hope you like it too.

Thank you for paying my little blog a visit, it gets lonely without you. Thank you also for the lively comments you leave, I always appreciate them.
Lainie xx

Wednesday 18 February 2015

Hello


Good evening, friends, fellow bloggers and followers,  I loved the free gift from C&C so much that I just had to use it for the Floral Challenge over on Docrafts.  I can't remember where the backing paper came from but I was so pleased that it matched the  colours in the image and the  Card Candi perfectly.  The ribbon and sentiment were from my stash.

Thank you for dropping by to take a look and any comments you wish to leave are always appreciated.

Lainie xx

Tuesday 17 February 2015

Snail Mail


Hello blogging friends, I have had a busy few days and not had much chance to play in my craft room. This is a card that I started last Friday for the Fab n Funky blog challenge but had my ex daughter-in-law and grandson visit over the weekend so crafting got put on hold then. Yesterday I had work to do and today was a catch up day. So the card didn't get finished until this evening.  It's just a little fun one with a poem I made up myself ( as you can see lol).
I used a 6"×6" card blank
             Free Raspberry Road Designs 'Love lives here' papers from Quick Cards mag
             Free stamps from Creative Stamping magazine
             Promarkers
             Free Clearly Besotted stamps
             Snail charm from a Docrafts buddy attached with garden twine
             Poem created on computer in A Little Pot font

Thank you for visiting and any comments are always gratefully received.
Hugs
Lainie xx

Saturday 14 February 2015

R is for Ribbon


Good afternoon to you all. Today's card is full of butterflies,  which is perfect for me 'cos I love 'em.
For this I used:
A4 white card folded in half and distressed with Shaded Lilac Distress Ink.
Free butterfly embossing folder. I ran the same Distress Ink over it once embossed. I then embossed a piece of white card again and cut out 2 of the butterflies,  which I mounted on to the embossed piece.
Clear gems
White dotty ribbon
Free sentiment stamp, stamped with the same ink.

I hope you like it and thank you for any comments that you leave.

I would like this card to be entered for the butterfly challenge - R is for Ribbon

Lainie xx

Friday 13 February 2015

Happy Anniversary


Today's card features the Marianne Designs Flourish and Leaves die and my newest favourite Honey Doo Crafts stamp which I coloured with Mustard and Buttercup Promarkers and then blended with the blender to give just a hint of colour.  I decided on a monochrome colour scheme with very little colour to give a softer look.  I do hope you like it.
I would like to enter this card in to the  I 💜Promarkers Challenge

Thank you for visiting and for leaving comments.

 Lainie xx

Wednesday 11 February 2015

Step by Step instructions for Valentine's card


This is the card which I made at my local card making class and I thought I would share with you the step by step instructions to make it.

Materials  needed are:
A4 white card
Red card
Invisible thread
Largest X Cut Nesting Heart die
Smallest X Cut Nesting Scalloped Heart die
Border punch

Step one


Cut a 4 cm strip from the long edge of the A4 card

Step two

Score the larger piece of card at 15cm

Step 3


Score at 4 cm along long edge

Step 4


Cut along each side of the central fold line down to where it meets at the 4 cm scoreline and snip a tiny piece out.

Step 5


Using a border punch, punch along the edge of the 4 cm scored edge, fold over and stick down in place

Step 6


Trim the 4cm piece which you cut off in Step One to 24cm

Step 7


Score at 6 cm,  12cm and 18cm

Step 8

Punch along one edge with the border punch

Step 9

Cut out 1 large heart and 6 small hearts. I chose to cut a central heart in the large heart too.

Step 10 and 11


Sandwich a piece of invisible thread between two small hearts and attach to the 4cm strip


Attach the 4cm strip to the inside of the card lining up the punched borders

Finally attach the large heart to the card front and stamp your sentiment

Thank yoh for visiting and any comments you wish to leave are always appreciated. 

Lainie xx


Tuesday 10 February 2015

Spring


Hello again. I am sharing the card that I made for the Noah's Ark Challenge over on docrafts.  For this one the theme was SPRING, so any animal but the card/project had to have an element of spring about it. 
The materials used were:
A4 white card cut to 15 cm x 15 cm
Free patterned paper from a craft magazine
Nitwits Collection 'In The Meadow' stamps
Promarkers

The sheep and word were coloured with Promarkers and then cut out and mounted on foam pads.

Thank you for visiting my humble little blog and I hope you'll visit again. Thank you also for the comments that you leave on this card and on my previous projects, they are much appreciated.
Lainie xx

Saturday 7 February 2015

Honey Doo Crafts Stamps


Here are a couple of cards created at the Paul Church workshop yesterday. We are always guaranteed a great fun time as well as learning new techniques or discovering the latest products.
For these creations we used the new Honey Doo Crafts stamps, which we coloured and layered up.

Thank you for visiting, I hope you like these. 

Lainie xx

Friday 6 February 2015

A card for St Patrick's Day


This is another Enchanted Challenge card and this time the theme was 'Male'. So I googled Leprechaun and found this charming little fellow. I hope you like him too.
For this card I used:
A3 Kraft card folded and cut to 8"x 8 "
Free papers - the bottom one was from Create and Craft and the top one was free with a magazine.
Promarkers to colour the image
Green buttons

Thank you for visiting, I hope you'll come again.
Lainie xx


Thursday 5 February 2015

Card for a Special Son


I was asked to make a card for an 18 year old with just the words 'Special Son'. This is what I came up with.

Materials used were: A3 black card cut to 8"×8" card blank
                                        Image downloaded from www.craftsuprint.com
                                        Decoupage paper to print a second sheet and decoupage the                                               cars
                                        Silver Bling Bling
                                        Computer generated sentiment.

I also downloaded the inserts to finish the card off nicely.

Thank you for visiting my page.

Lainie xx

Wednesday 4 February 2015

Book Mark Wedding Favours


These could be created for any wedding theme and personalised accordingly.  I think they would be perfect for the men as most wedding favours are designed with the ladies in mind.  I am thinking of the wedding favours that I have received in the past.

I actually downloaded a printable sheet with these on from Craftsuprint which were nice but a bit flat. So I cut and decorated some of my own.

I used: A4 pearlised card in silver and bronze
             A pearl brad
             Adhesive pearl hearts
             Free sentiment stamps from magazines
             Versamark ink pad
              Sea foam white embossing powder
              Metallic embossing powder

Thank you for visiting

Lainie xx